Experiments in 3d printing video game characters
Hi All.
I just wanted to share my progress in learning how to 3d print video game characters. The last time I blogged about this (see here), I was excited to show you some of the weapons I printed. Now it’s time to show my progress in printing the entire character. All of these models have been extracted from a game called “Guild Wars 2”.
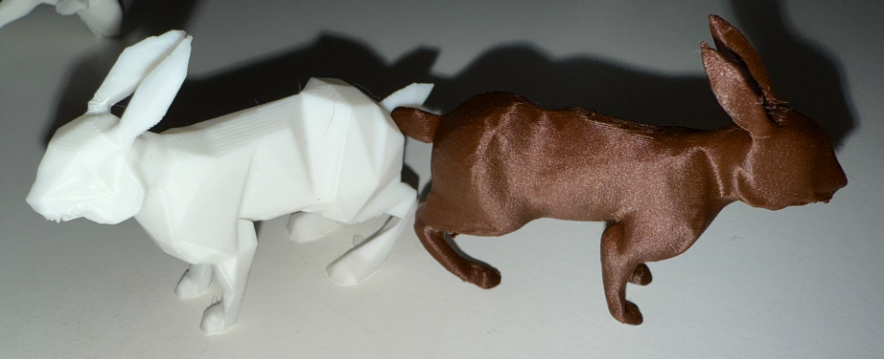
Final results look like this, but see below for the journey to this point.
My First Attempt looked something like this:
The aspect ratio of the model looked terrible (she’s stretched out too tall, oops!). I also printed the model laying down flat (less support material needed), but the layer lines were quite noticeable.
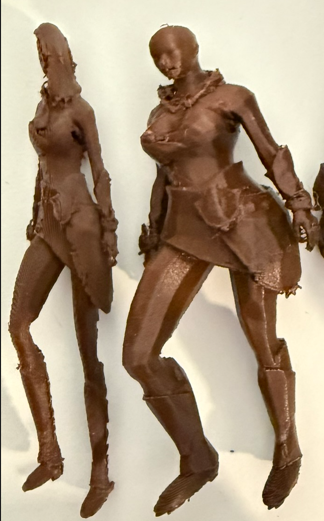
For the second character I printed, I fixed the aspect ratio and the layer orientation, but I realized I had two more problems I needed to solve:
- The hair was not printable. I skipped it for this iteration (it didn’t have any volume to it)
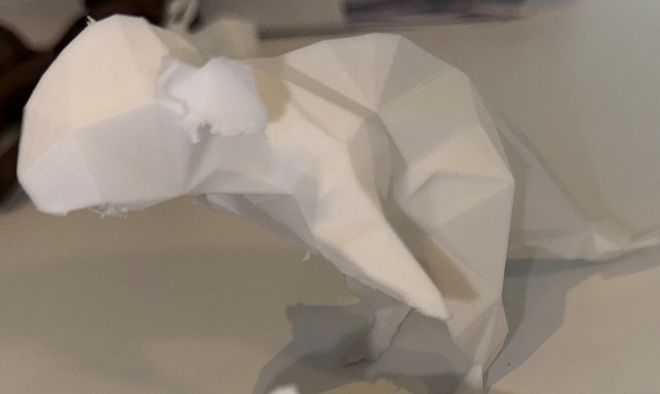
- The mesh for the character is exceptionally coarse in areas, such as the legs, that are heavily faceted.
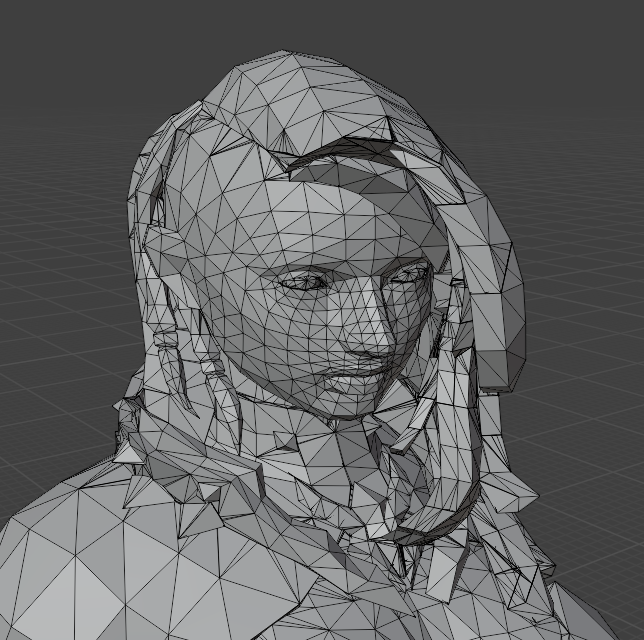
It took me a little while to figure out how to deal with the coarse mesh. I was stumped for a while when I noticed there was more than one way for the mesh to be rendered. When the mesh is part of a video game, it typically has a “smooth shader” applied to it, causing it to be visibly more rounded. A coarse mesh model used for 3d printing is going to look more like the left picture.
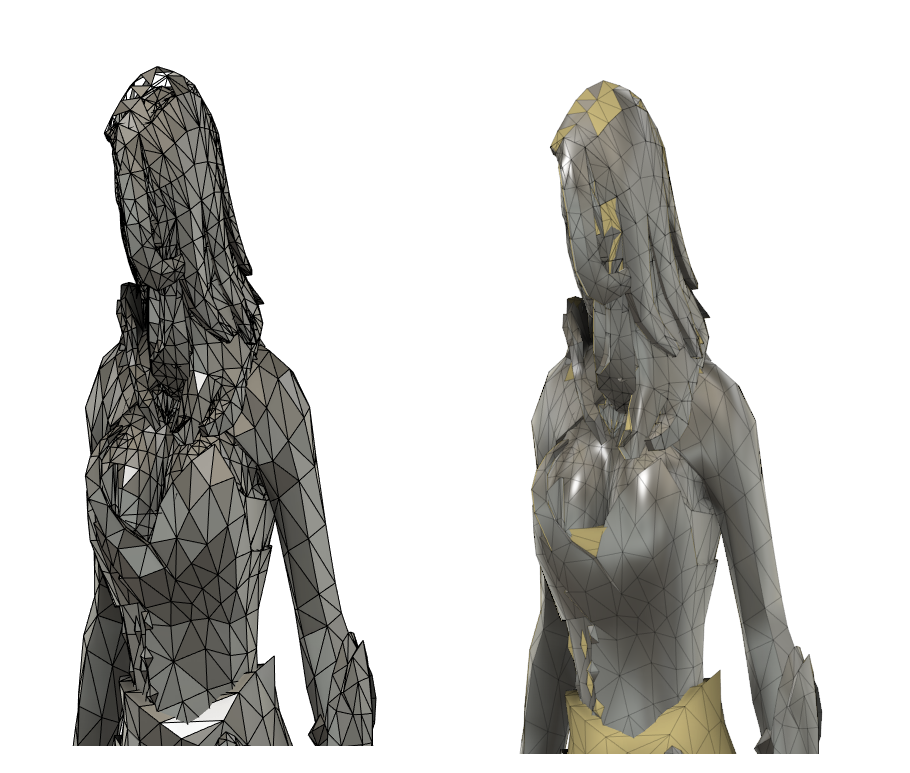
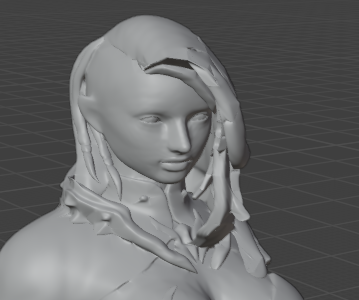
My fix for coarse mesh: “Blender”. The “Subdivision Surface” modifier is the primary tool I used for smoothing out the mesh. it can interpolate faceted areas of the mesh, and make them more rounded.
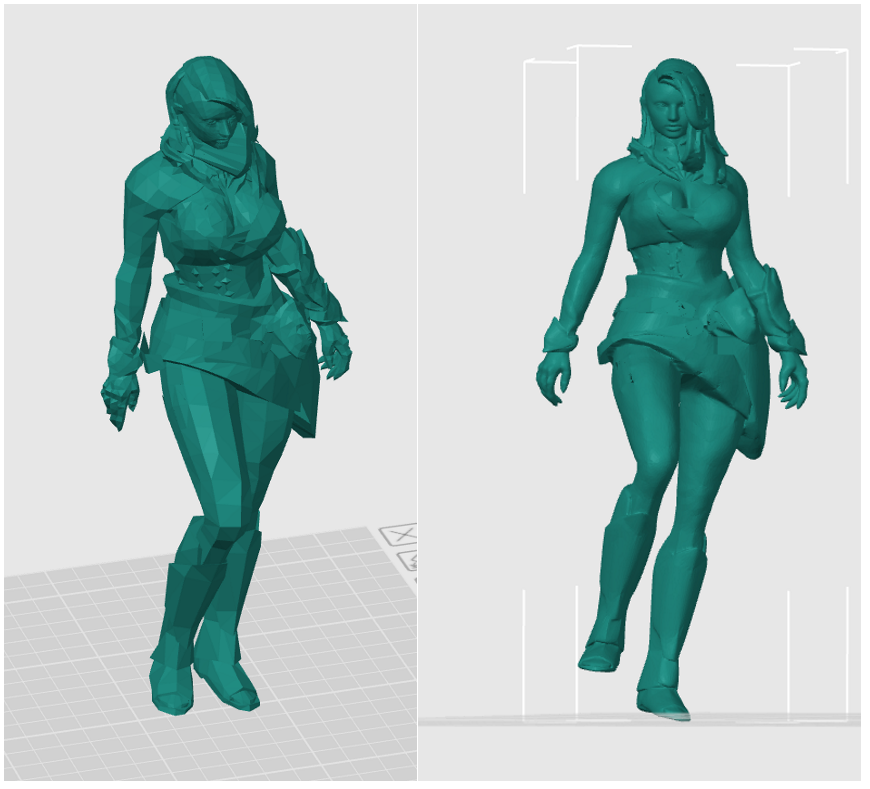
I quickly applied this tool to some models i previously printed, with impressive results:
The last thing i did to this character, was repair the model of the hair. Originally the hair had no thickness, and i used an extrude command to thicken these areas of the model that had no thickness.
The results of these improvements can be seen below:
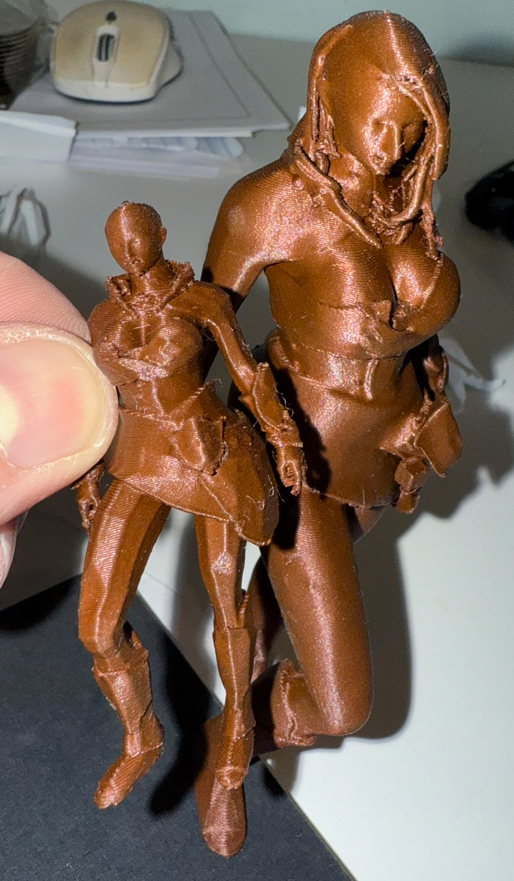
Learning how to solve these issues allowed me to create this model.
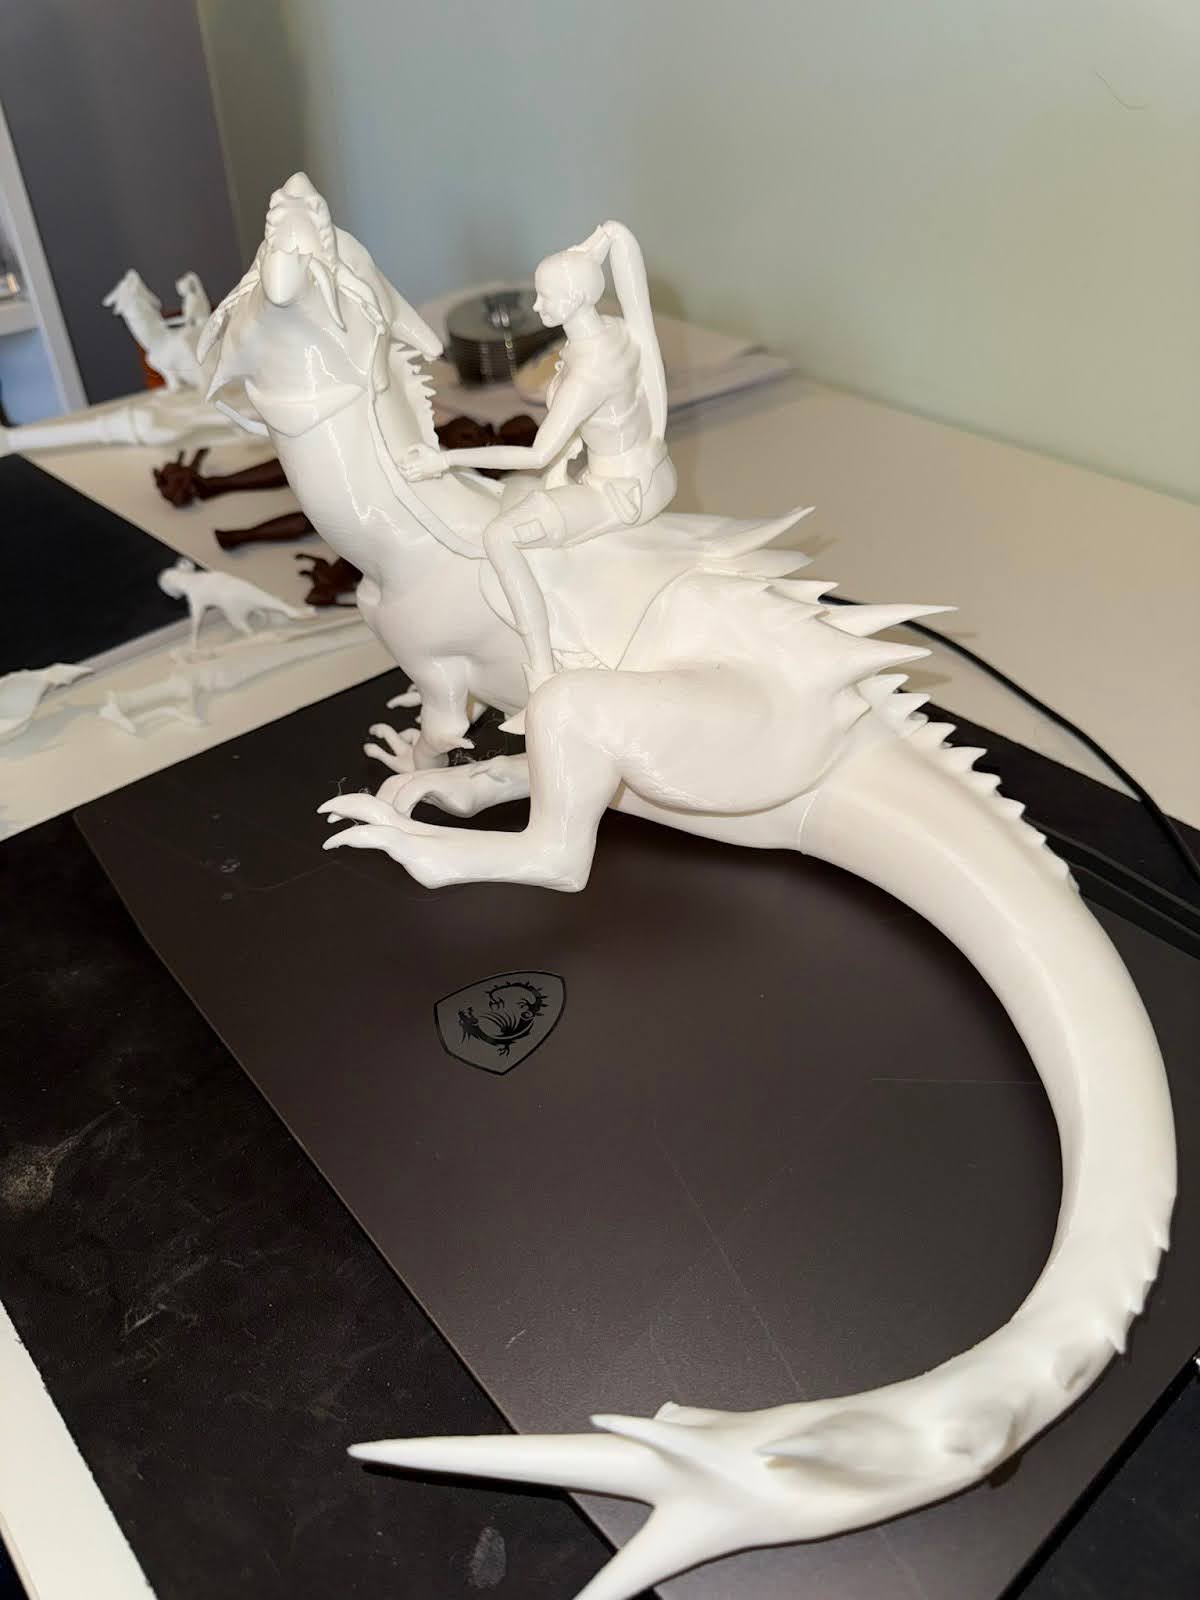
Finally, I created a super-size version of it, laptop for scale. For this model, i had to use the “Cut” model feature in Orca slicer, to section the model into 2 pieces. This feature allows “connectors” to be added to the model, which are like dowel pins for alignment.
If you got this far, i hope you enjoyed reading about this topic. The tutorial I used for most of my inspiration was found here.
If you have any questions about this process you can email us at contact.cthackerspace@gmail.com I will likely also be at the space on the 2nd and 4th saturdays of the month. Please reach out if you want to learn more!